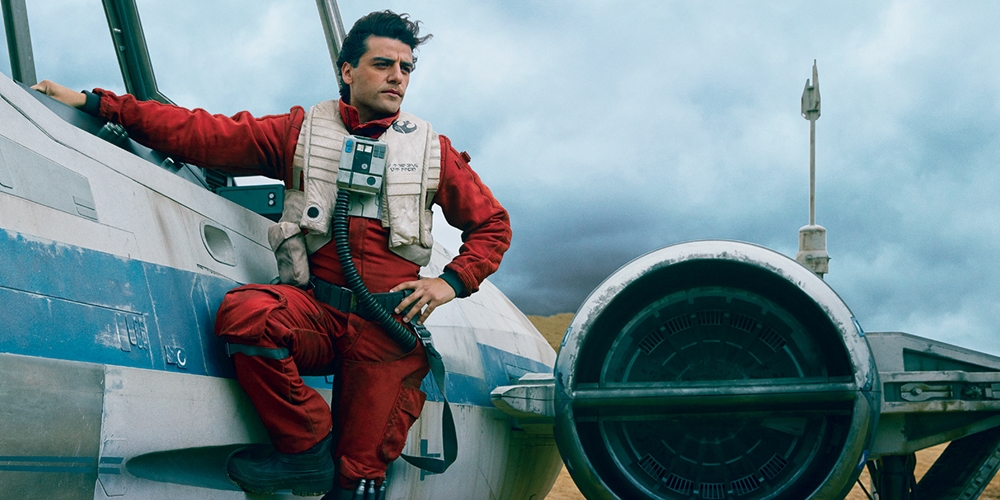
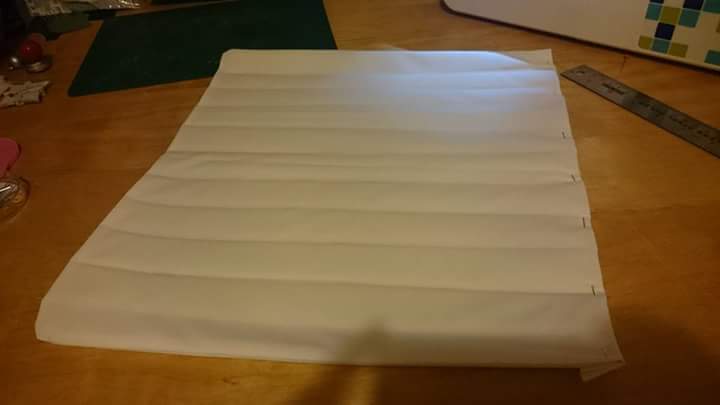
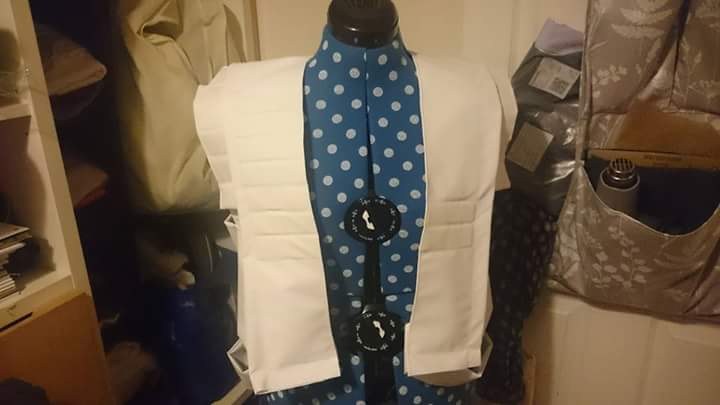
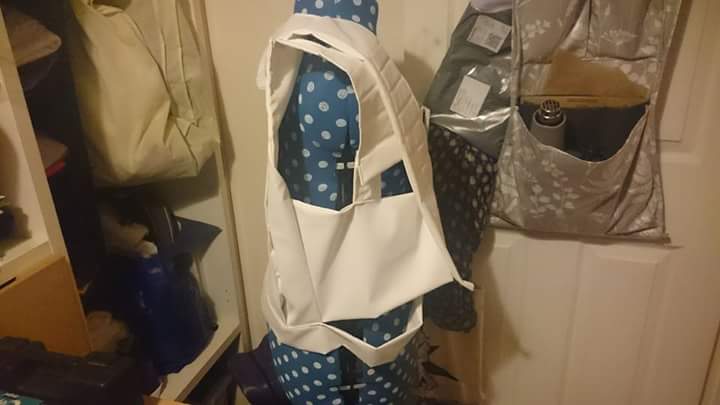
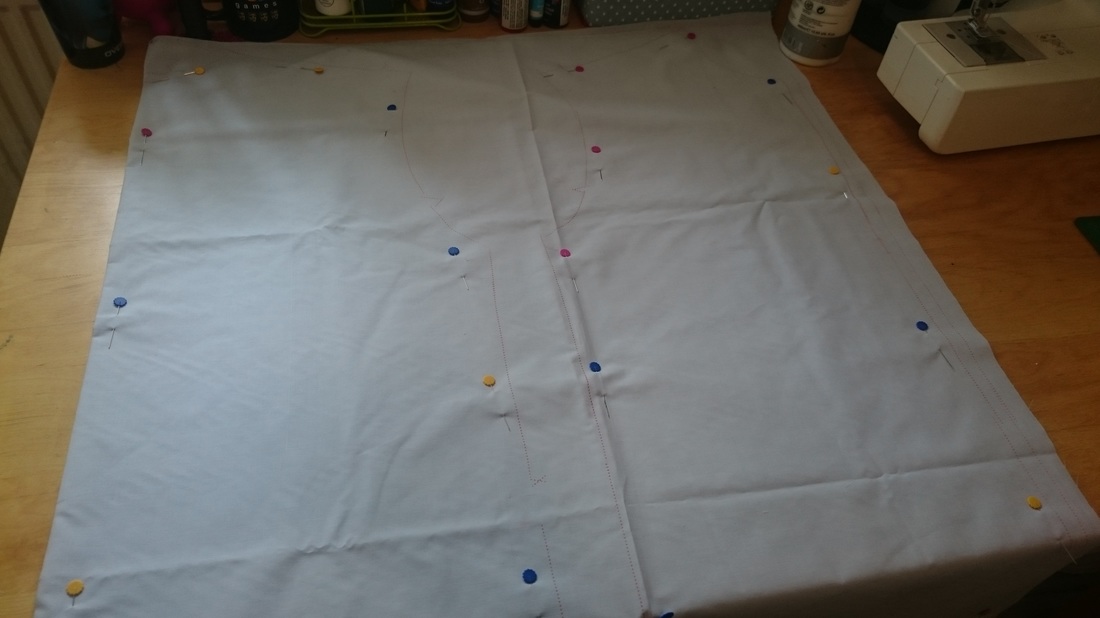
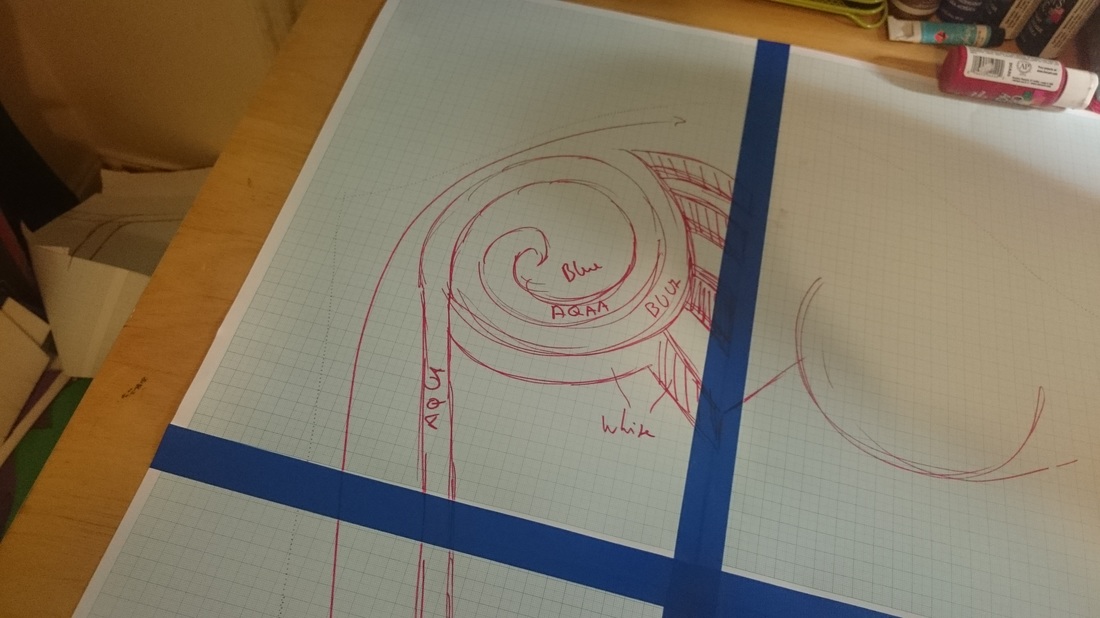
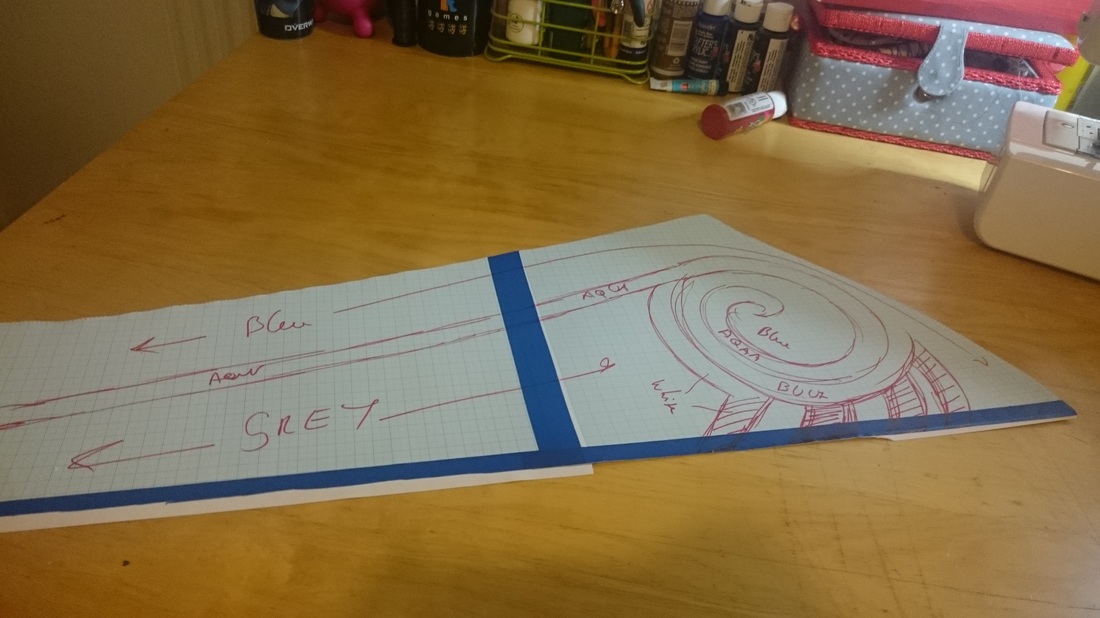
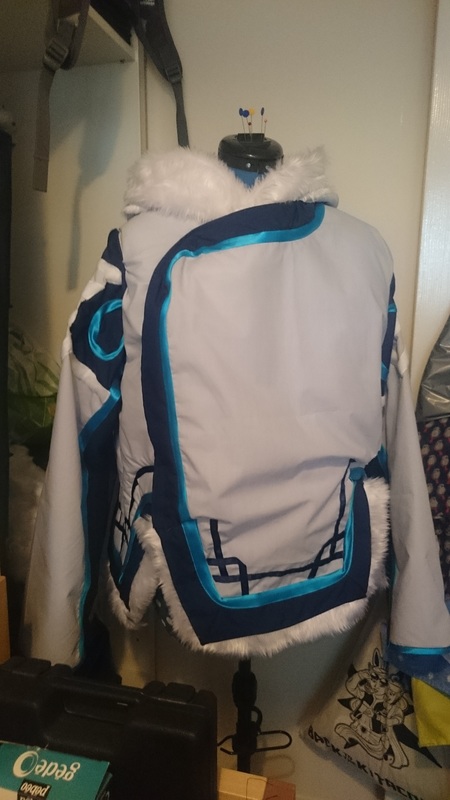
 I was commissioned by a friend to make the white life vest for a Poe Dameron/Resistance Pilot cosplay. It proved challenging but thankfully my client provided the most in depth reference material I've ever received and even provided the fabric! :D 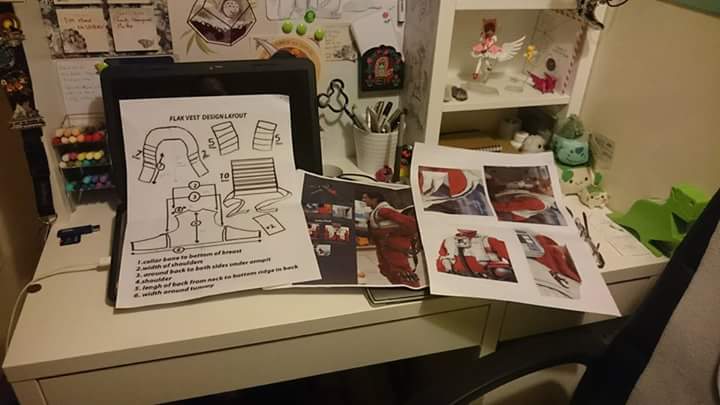 The key was to make the vest in 5-6 seperate elements; - The main body, which was the back and sides - the collar - the 2x chest sections (that go underneath the collar) - 8x strips of fabric (to attach the chest sections to the shoulder and waist) - and the back square with belt 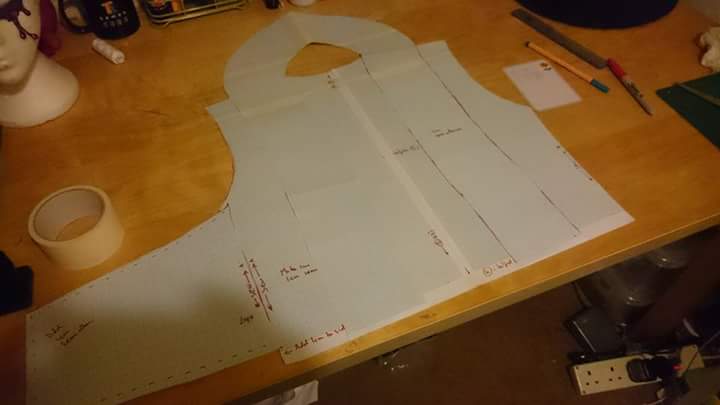 with graph paper I measured everything out to create my own template. As I couldn't really find a sewing pattern close to this design, I ended up making the whole template from scratch. There was a lot of math involved lol ლ(ಠ_ಠ ლ) 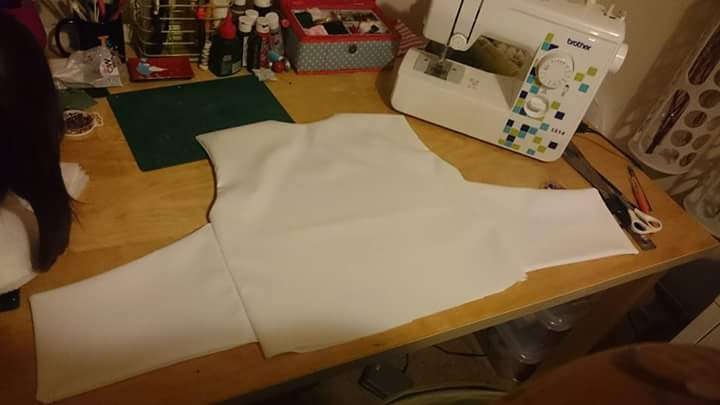 Once I had everything measured, actually making the vest came fairly naturally to me. The material was of an off white matte vinyl that was fairly easy to sew with and didn't fray. I started with the main bulk of the vest which was the back and sides.
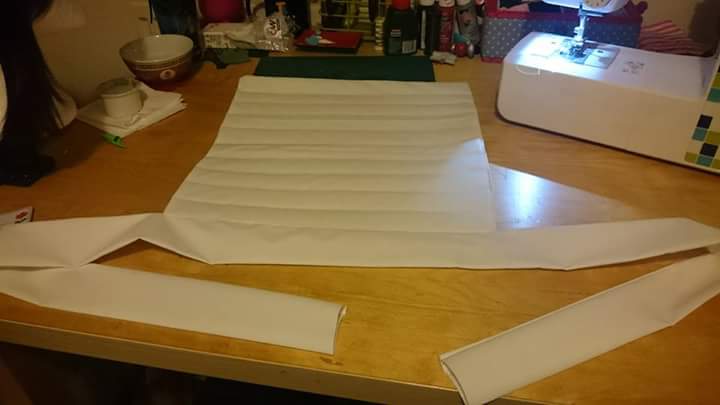
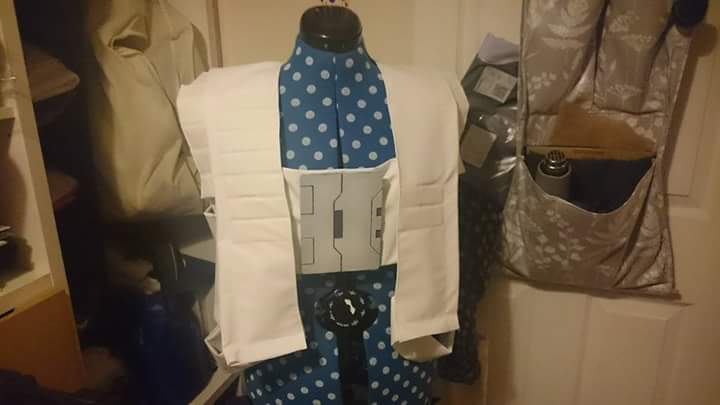
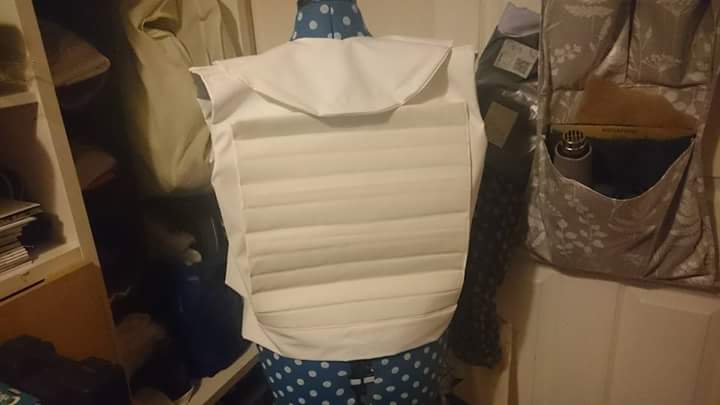
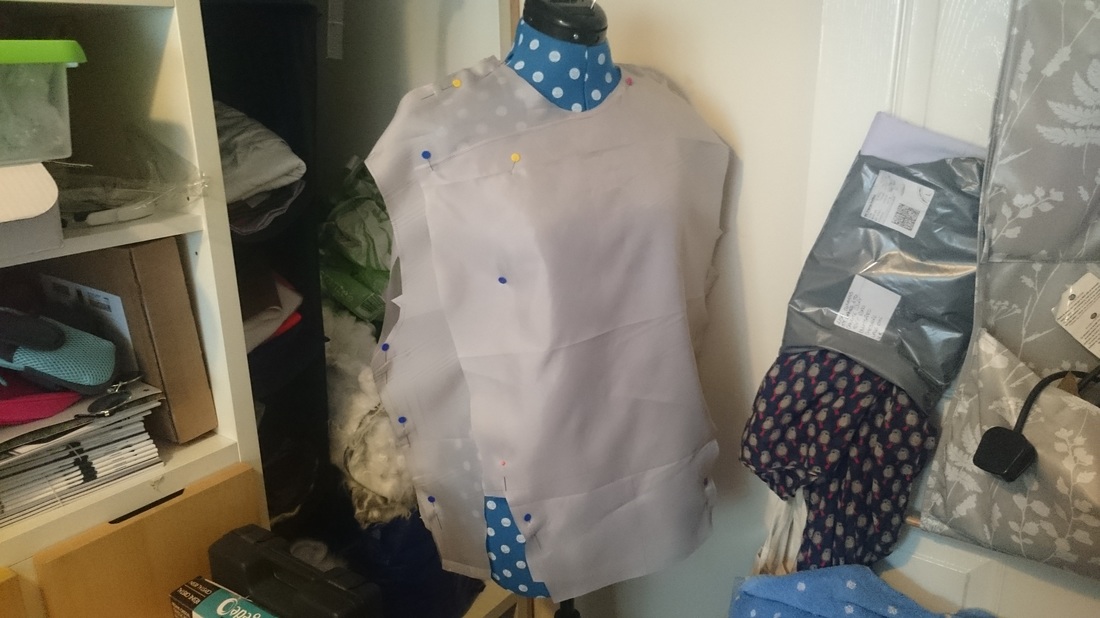
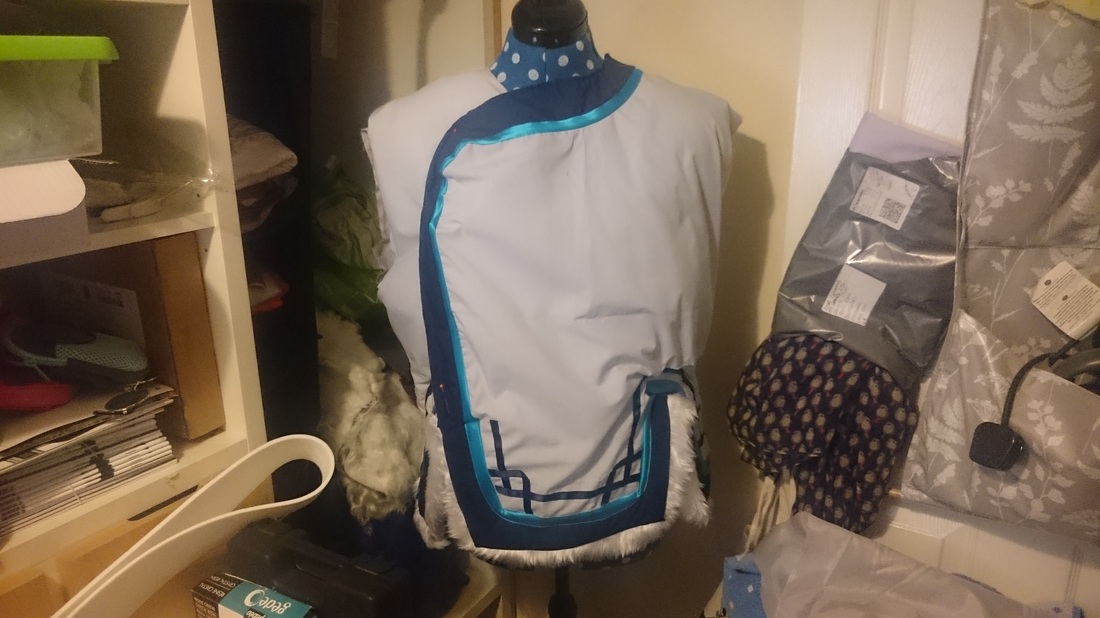
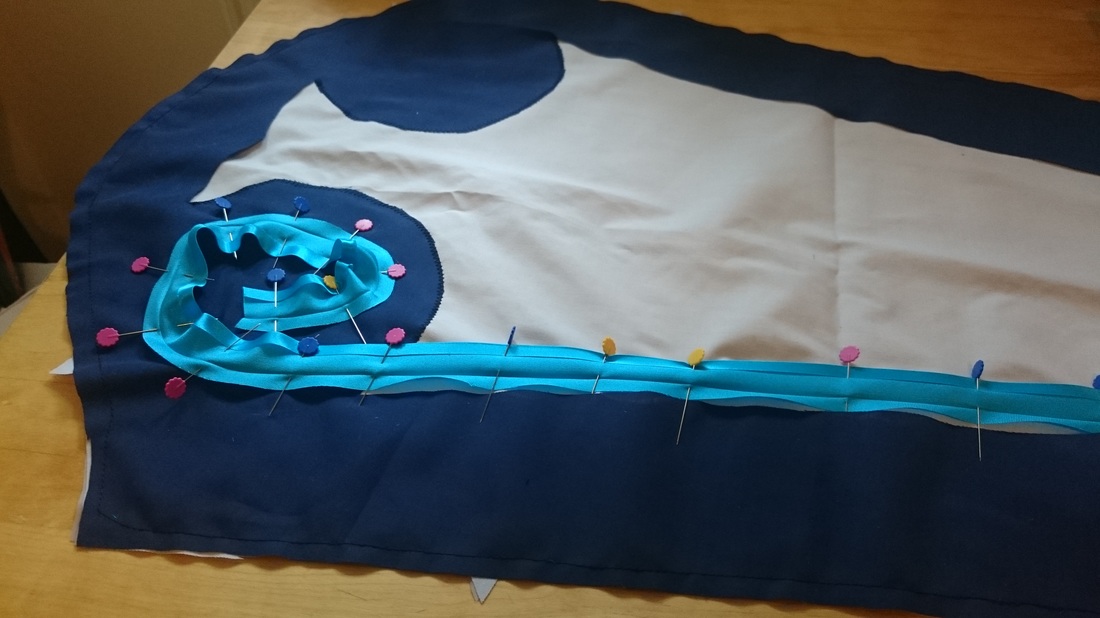
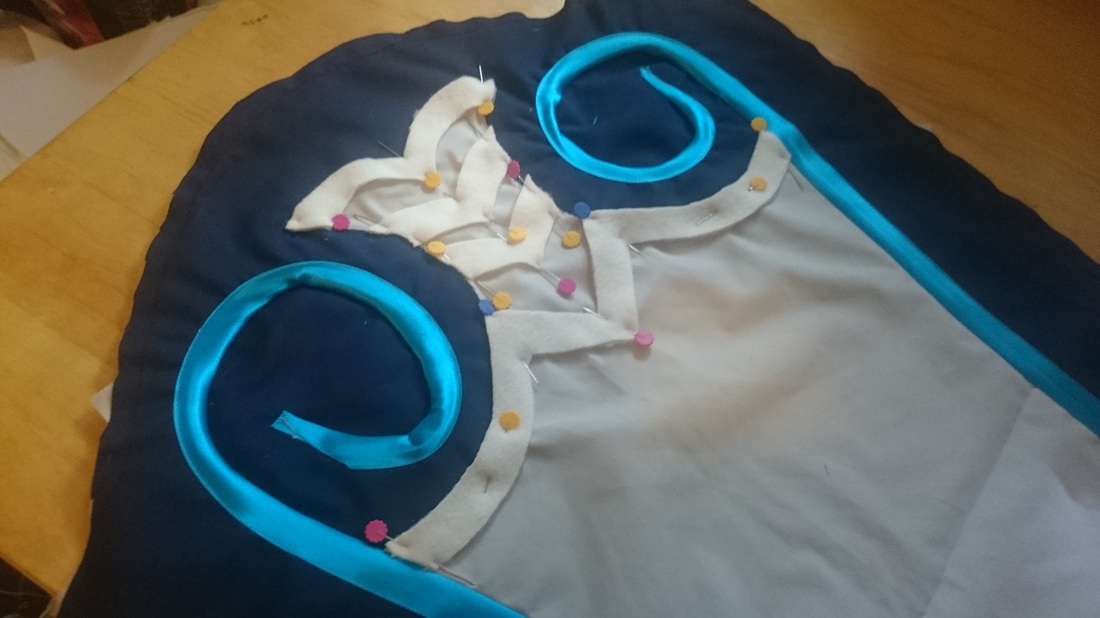
The back square, which was to be sewn on top, was made creating 10x channels across, leaving an opening on one side to insert thin EVA foam. This created the thicker, puffier effect of the life vest. The belt was sewn onto the bottom and would wrap around the front when complete. 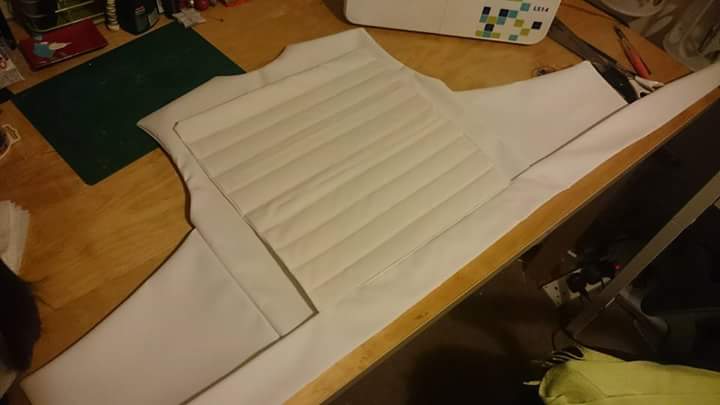 The square was then sewn onto the main body. Starting to look good all ready (^▽^) 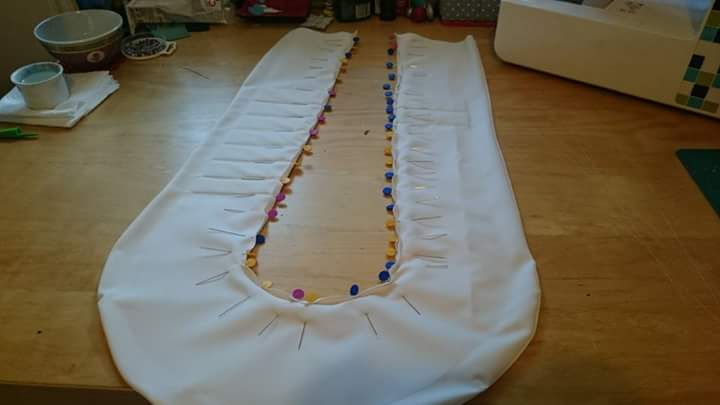 The collar was perhaps the trickiest to get right. I wanted it to be one continuous piece of material, so getting the shape and the curve right was crucial. I began by cutting two sections of material and placing on top of each other right sides together. Then I sewed the outer edges together. Turning the fabric inside out so the correct side was showing, I pined the inner edge but made sure I had created my channels either side for the detail (7 down the right, 2 on the left). The channels had 2-3cm gap from the outer edge and a seam was created around the collar to allow tubing/wadding to be inserted to create the round edge. I then inserted foam into the channels and proceeded to sew the entire edge closed. 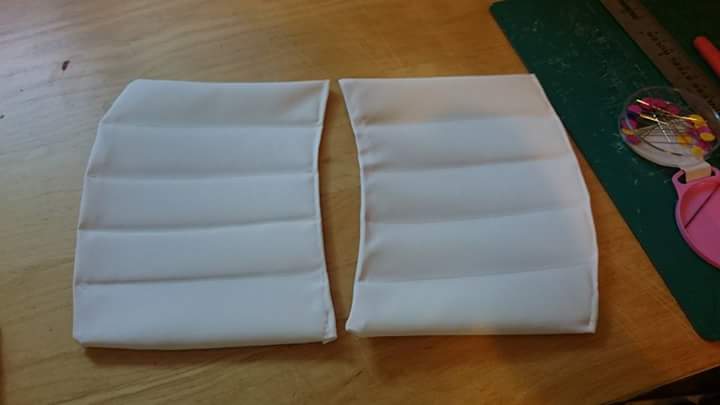 Similar to the back square, these chest pieces would sit underneath the collar and were made with foam inserts to create a thicker appearance. Not pictured but 4x strips of the same fabric were sew onto each piece so they could be attached at the shoulder and to the waist (on the back piece).
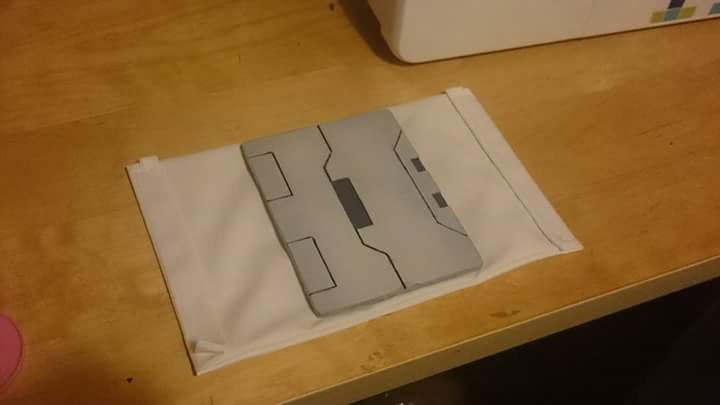
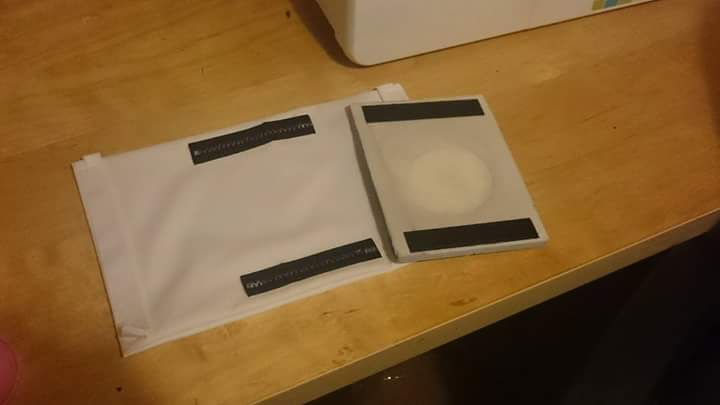
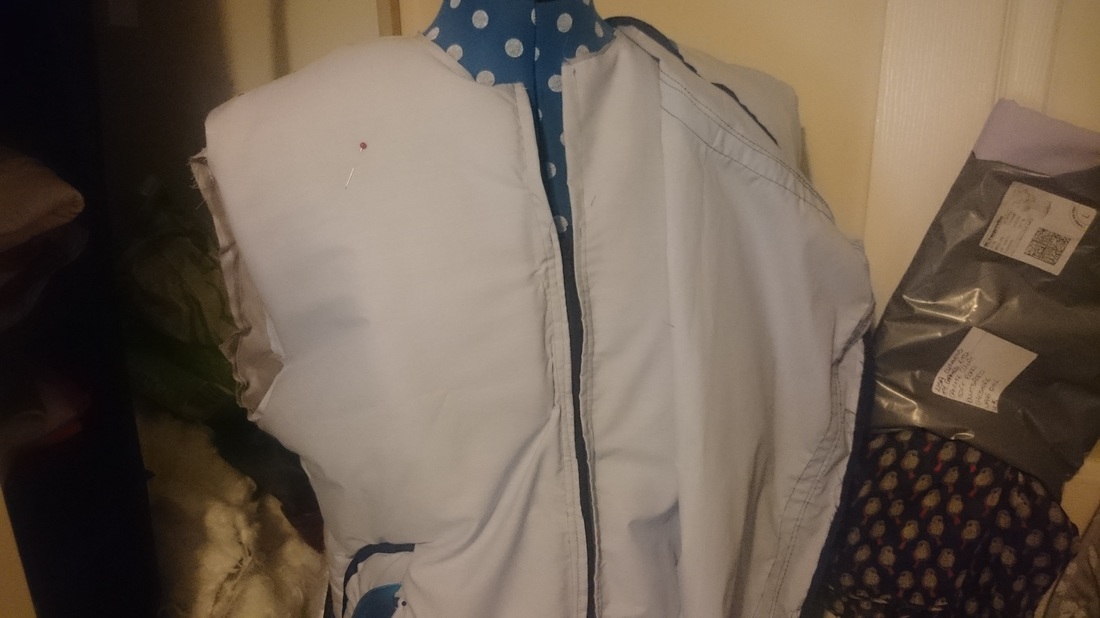
This buckle/plate was provided for me to attach to the vest. I glued Velcro to one side of the plate and onto a square flap I made with the remaining fabric. This would allow the client to remove the plate from the vest for easier storage/travelling. 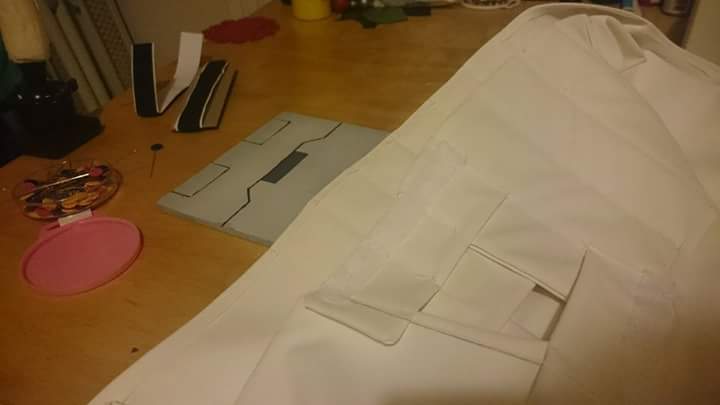 white Velcro was then sewn to the inside of the straps, connecting the chest pieces to the waist. The plate flap could then be connected to the inside and sit comfortably on the chest of the client. By doing this, the client would be able to remove the Velcro plate/flap and then slip the vest off like a coat, without the need to pull it over the head. The vest was done.
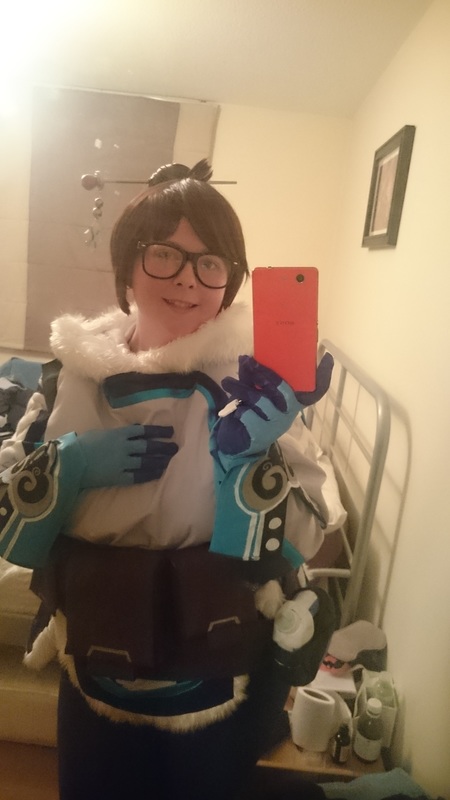
Weathering and the final little details, such as symbols and text was added after. The final result is very cool 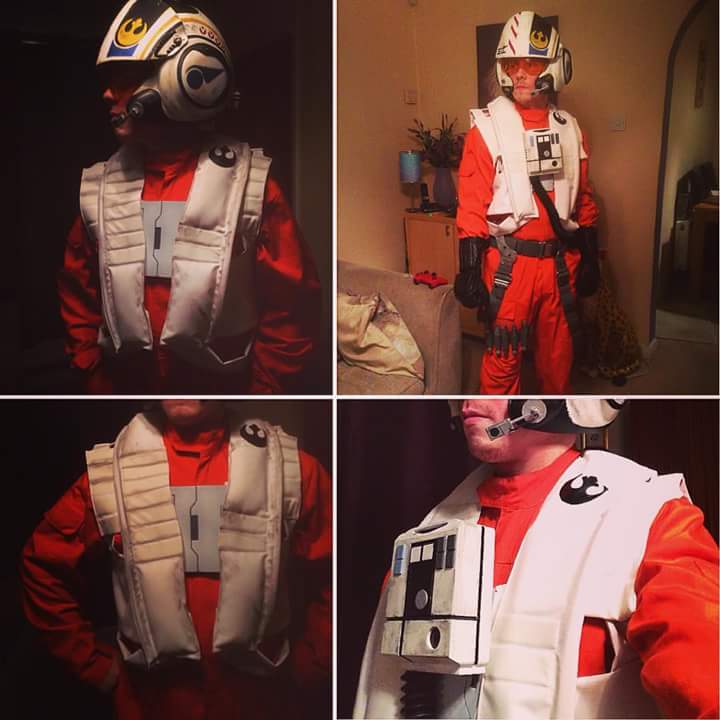 Thanks for reading!!Hoping to make tutorials a regular thing on here.
Big thank you to everyone so far who has visited and enjoying the website. Remember you can follow me on various social media - just follow the links on the right ta for now <( ̄︶ ̄)> Lisa xx
6 Comments
Before cutting anything with the proper fabric, I first made all of the lining to make sure the coat was the correct size. The Hoody pattern ended being HUGE, despite measuring at a medium size. So I tacked everything to my tailors dummy and was able to accurately get the length I needed. This also made measuring the flap across my chest a lot easier. Once my lining was correct, I was able to move onto the actual fabric. 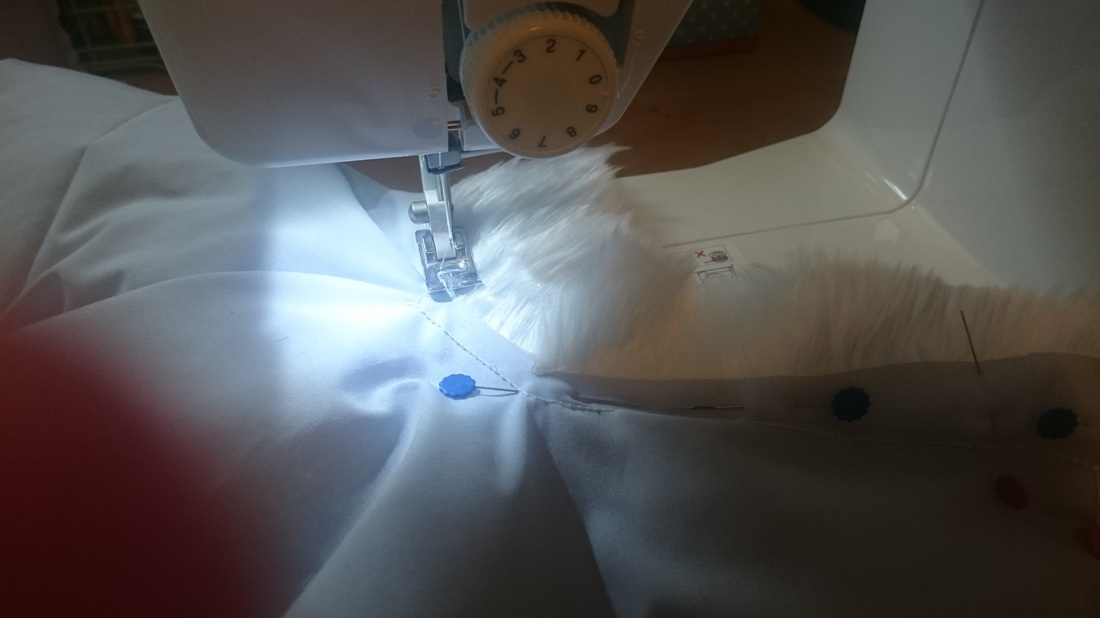 Onto the grey polycotton fabric, I began sewing on all of the faux fur trim. Thankfully my new sewing machine can power through fur no problem now. 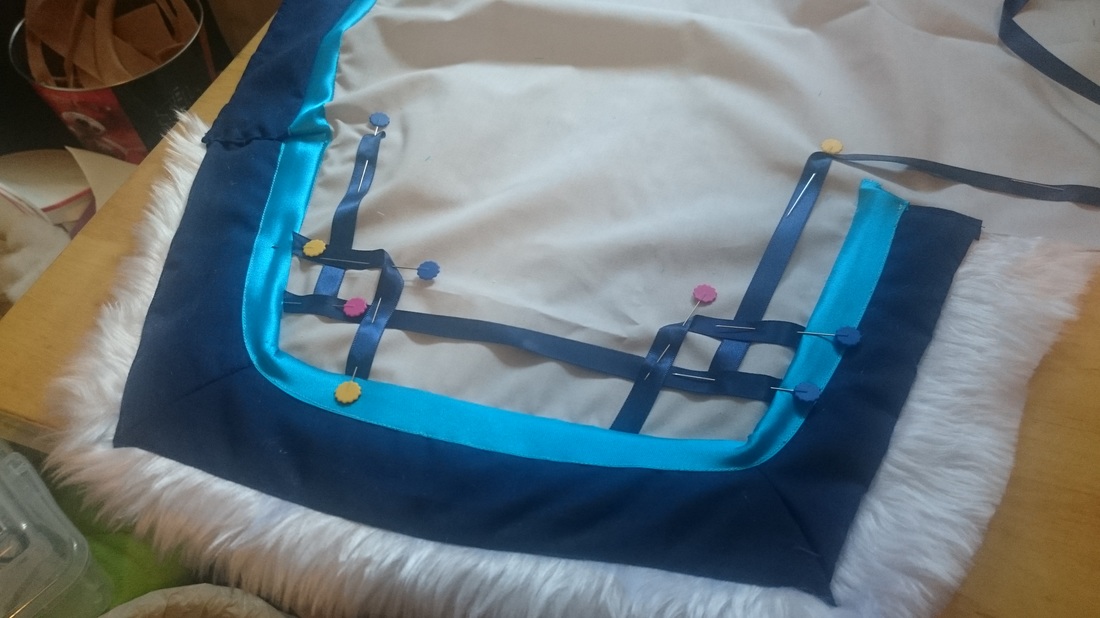 possibly the longest, faffiest part of the coat was meticulously sewing on the 3 different elements on the trim/flaps. I used blue polycotton to create my own bias binding (cutting strips, ironing down the edges and then sewing onto the material to get a nice neat edge), then topping with blue satin bias binding and then finally some navy ribbon. I was very happy with the end result 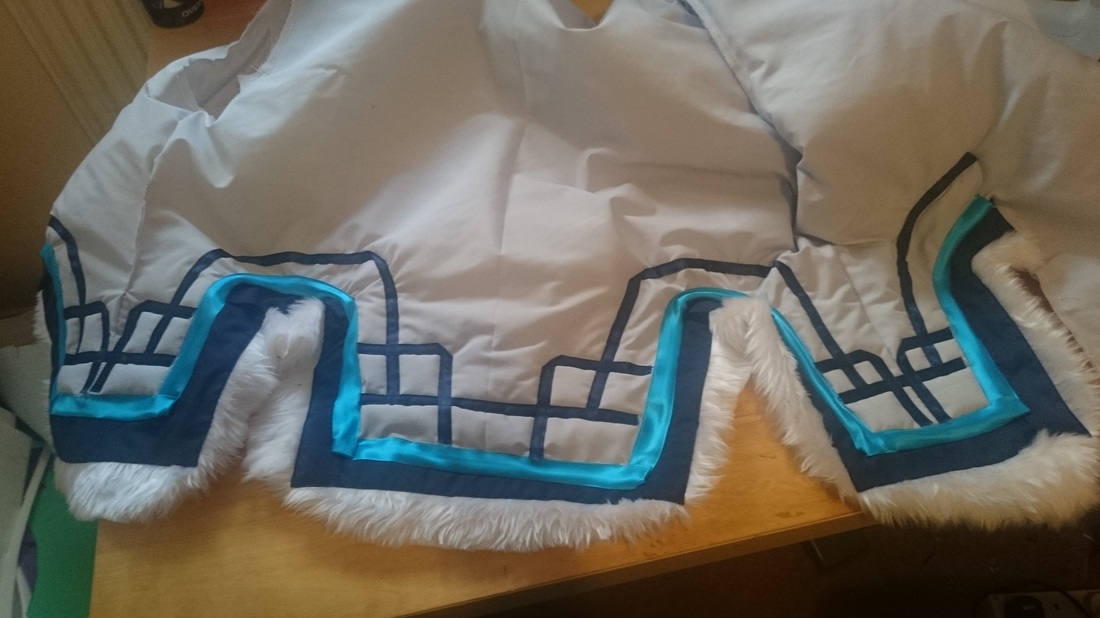
Thought not pictured, I sandwiched 4oz wadding in between the polycotten grey and the lining, to create a nice pillowy snow coat look. This of course made everything super bulky (; ̄Д ̄) Once all of the trim was installed, I implemented a zip into the front of the chest. This was nicely disguised by my custom front flap, which was held in place with velcro. Finally, the coat was getting somewhere.
Onto the sleeves! using the same pattern for the hoody, I took the sleeve pattern and made a duplicate on graph paper to work out where I wanted the pattern to go. I then transferred, using tailors chalk and a tracing wheel, the pattern onto the sleeve fabric. 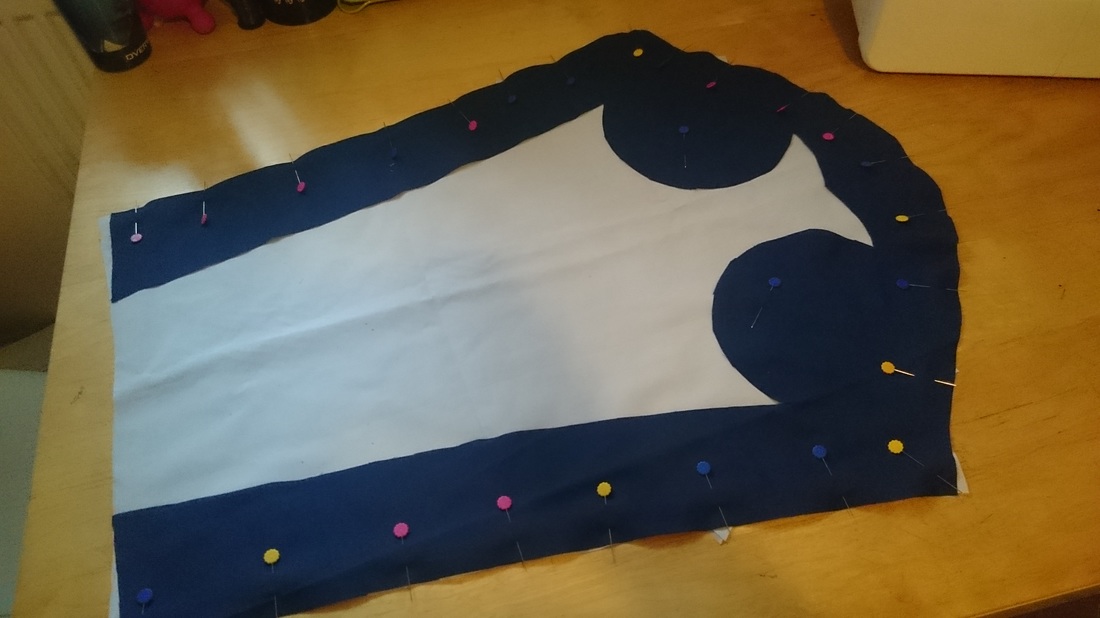 Thus began an afternoon and meticulous cutting and stitching to get the sleeves right. The blue was made with the same blue polycotton from before.
Then I followed with the same blue satin bias tape to create the swirl and finally some white felt. The felt was great as it doesn't fray and so could cut a nice clean shape. Plus the fuzziness added a nice winter texture. Needless to say, the sleeves could get stuffed. Onto sleeve number two! 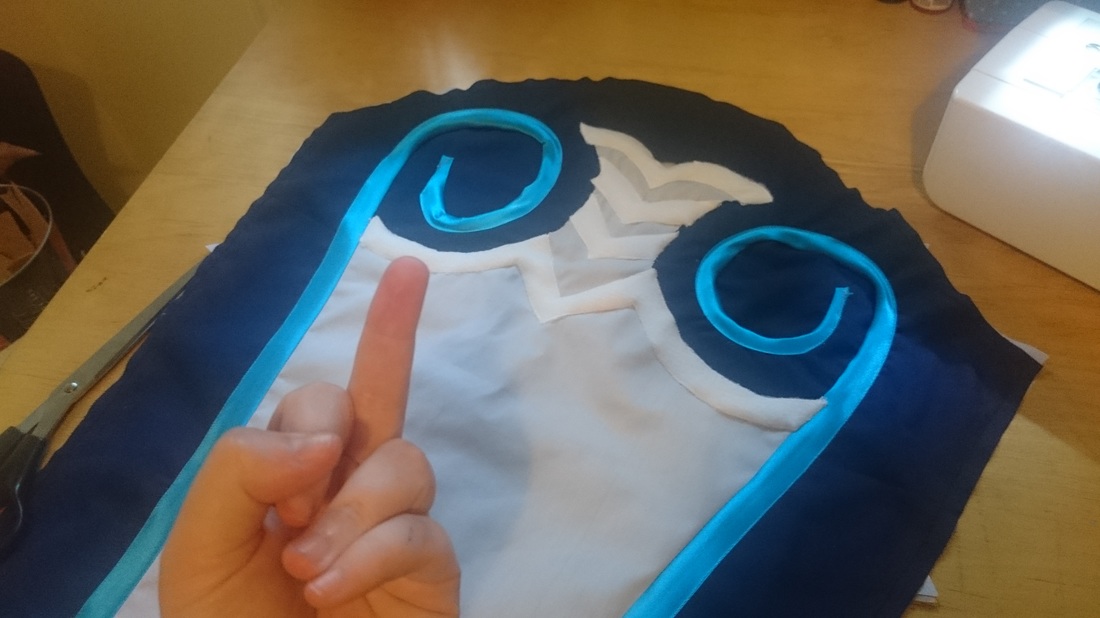 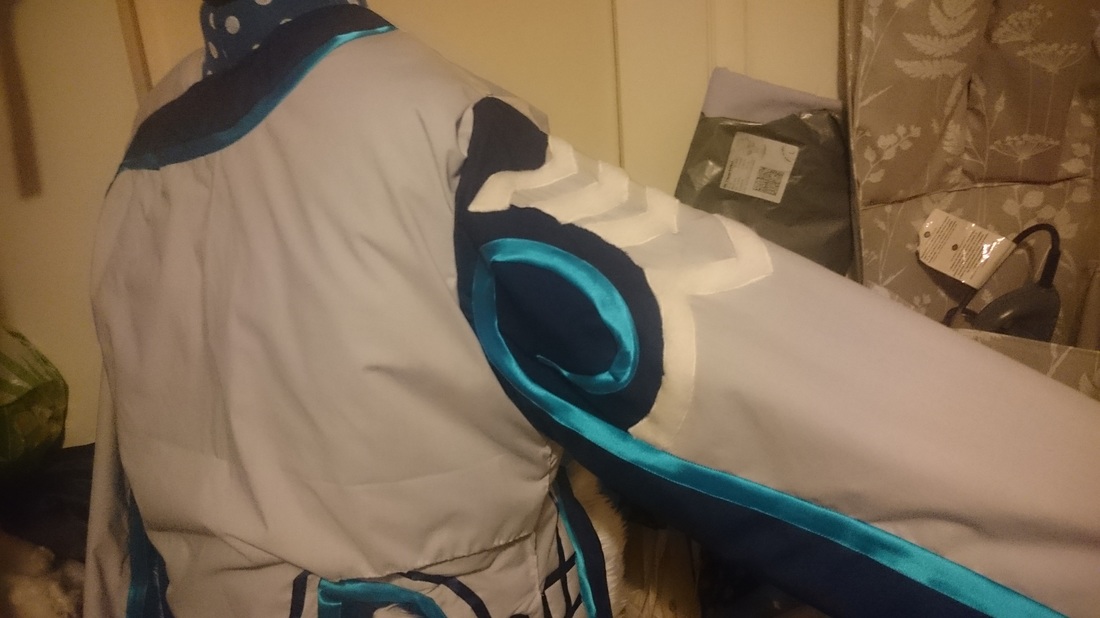 Once attached, I realised the sleeves were MAHOOSIVE on me and needed pinching onto my shoulder to raise it up. It wasn't too bad as I knew the tank straps would cover my shoulders anyway, so it wasn't too much of a problem. All I needed to do now was add the hood (which was simply cut and sew the 2 parts together and add fur) and the coat was done! To create the fluffy collar look, simply sew a strip of fur along the hood longer than the actual hood itself. Then when you've sewn the hood on, tuck the excess fur behind the front flap to create a faux furry collar. 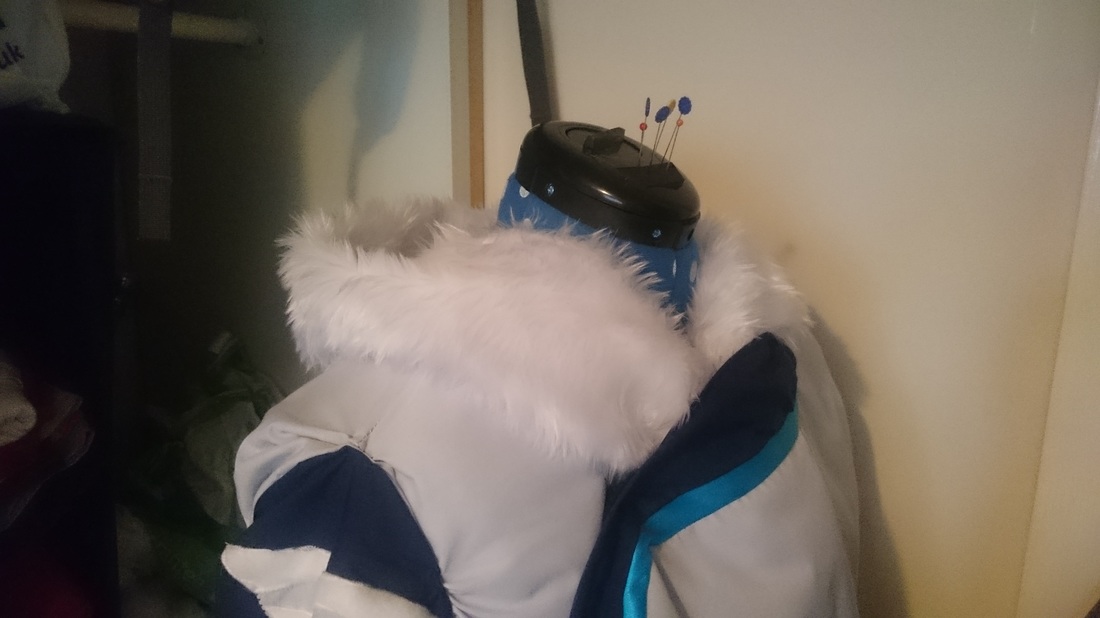
Thanks for reading!Really hope you find this useful at all lol Its my first time making such a detailed coat :D
Hopefully I'll get more tutorials on here soon. ta for now Lisa xx
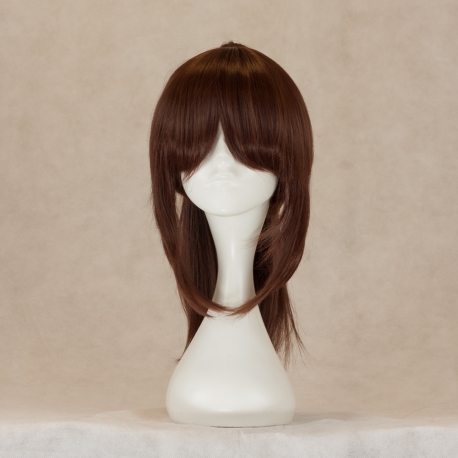
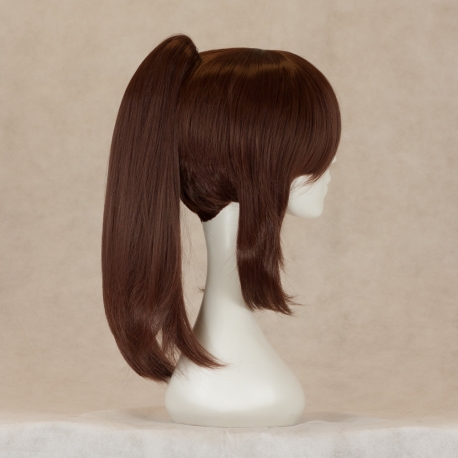
In the end I settled for a Sasha in rich dark brown with matching wefts from Coscraft The back of the hair was perfect to create a faux bun and needed very little trimming. The bangs were a perfect length to trim and shape. The pony tail is a clip on, which I put away for a later cosplay :P 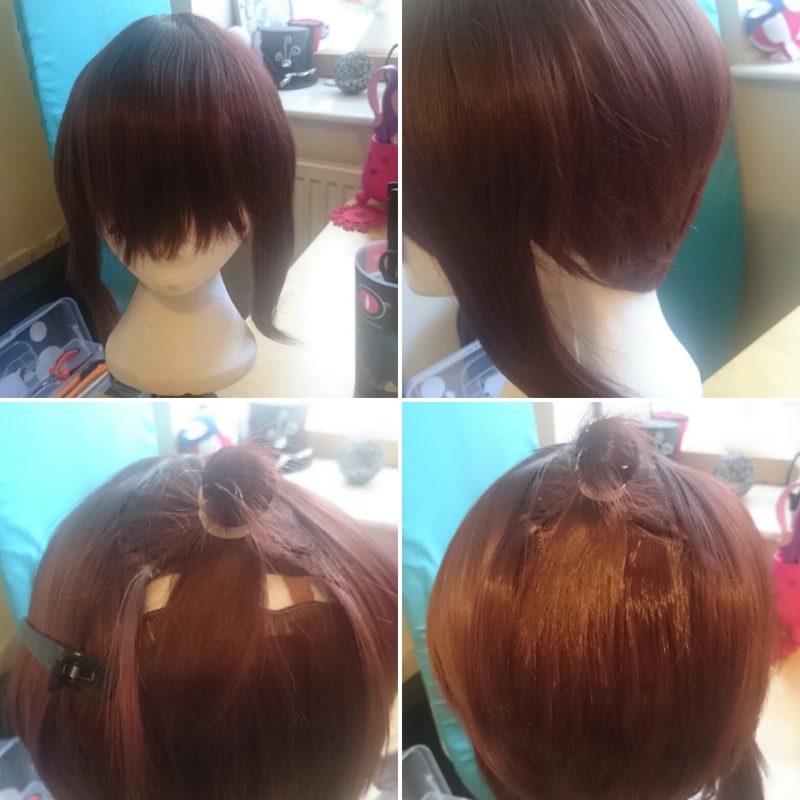 On the base of the wig I made a tiny pony tail tuft to glue the bun onto. as you can see this cause a lot of gaps in the base, which would expose the scalp. Using the wefts I covered the holes, sewing and glue into place until the scalp was covered 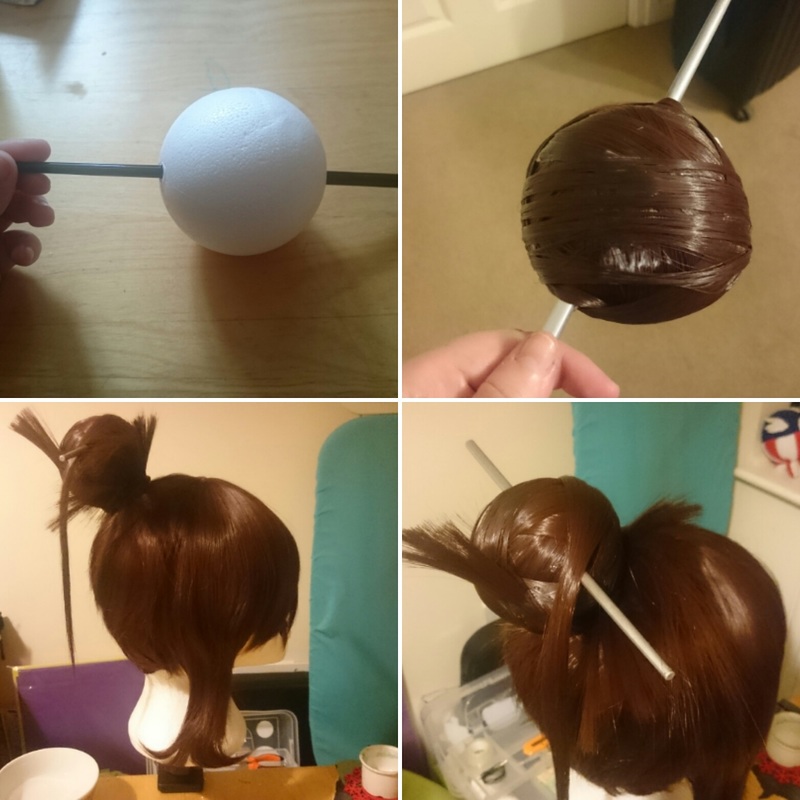 I bought a medium-small sized polystyrene ball from the hobby shop carefully cut a hole in the bottom, to create a space to stick it to the wig base. I then carefully forced a chopstick through the polystyrene ball to create the base for Mei's hair pin. Next I painted the ball brown so no white could be seen after applying the wefts. The wefts themselves were glued in strips, following the contour of the ball, untill it was completely covered (making sure I didn't cover the hole on the bottom) I glued the bun onto the tuft and once secured, I added wefts to the base of the bun to wrap around, creating the illusion that the bun was apart of the base. I added little tufts at the front of the bun to recreate Mei's sticky up bits. 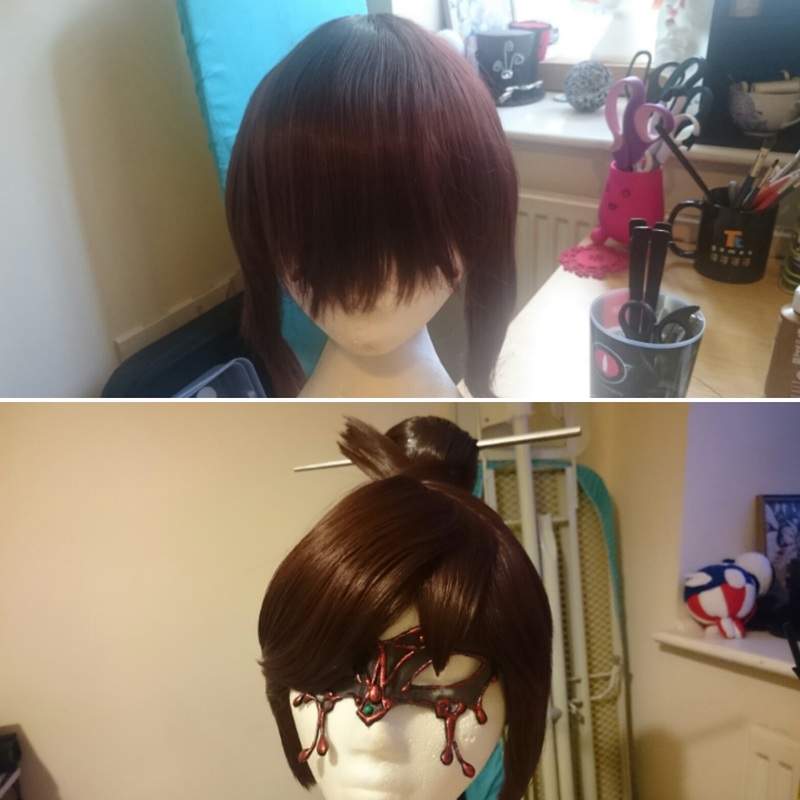 Like styling hair, the bangs took precision and patience. Cutting vertically, I slowly chopped away sections at the sides to get the right length. The front was sectioned into 3 parts; the main chunk on the right, the pointed bit in the middle and a little chunk on the left. These again were cut vertically to shape and length and then hair sprayed with Got2B hairspray into place.
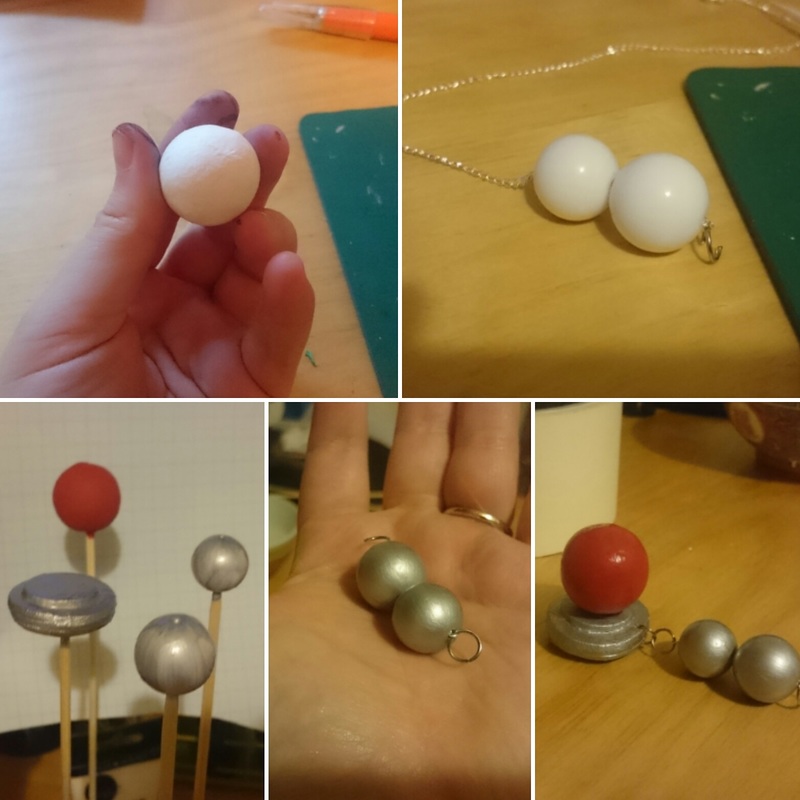
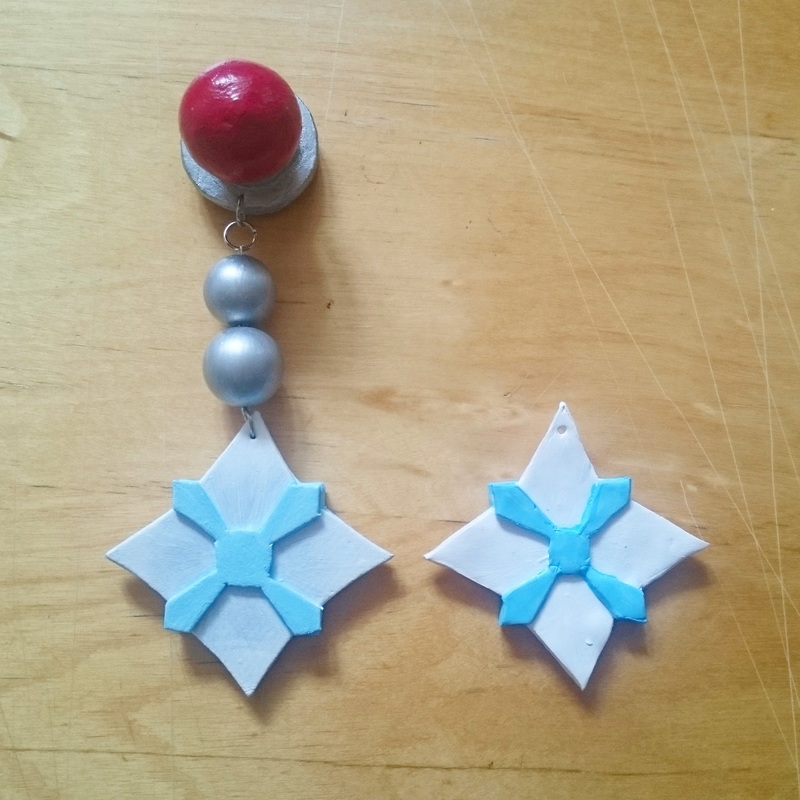
I wanted to get Mei's charm as identical as I could to the reference. This meant taking some existing beads and painting them silver, threading them through some necklace chain and using jump rings to seal the ends. The "UFO" bit was made with EVA foam, glued, stacked and sanded, then primed and painted with the same silver paint. The red ball was just a foam ball used for model miniatures that I painted red and gave a few coats of wood glue to make it shine. The rest of the silver sections were then all attached and finished with a gloss varnish. The star was first made with sculpey light, but I was so unhappy with the finished result, I had to redo it. This time I used EVA foam, which made it much lighter and I was able to get a more accurate cut. This was then primed, painted and sealed with a varnish coat. Everything was then attached using the jump rings and then attached to the chop stick. The wig was finished!! 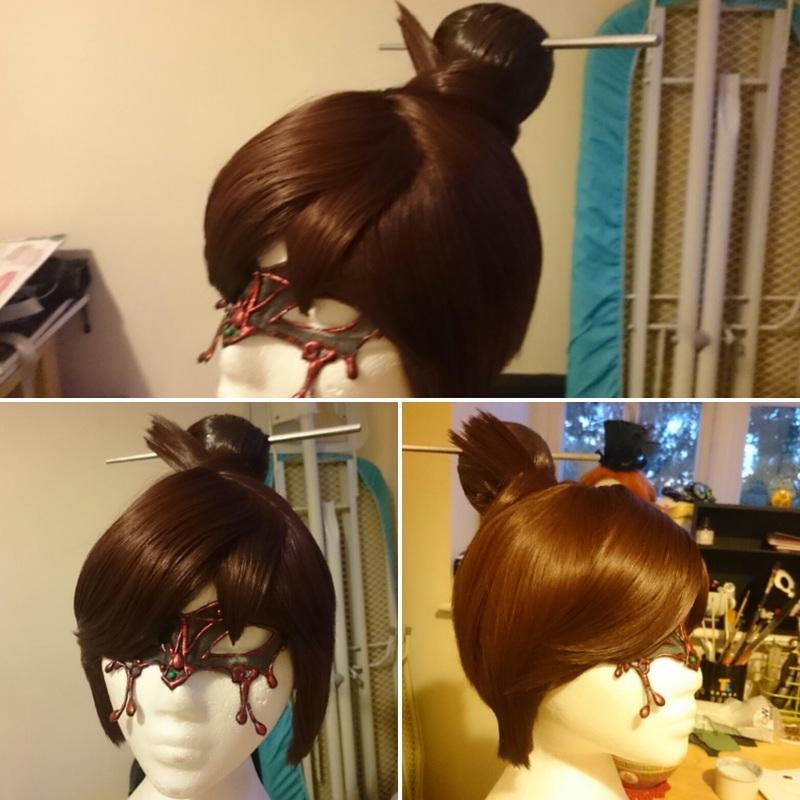 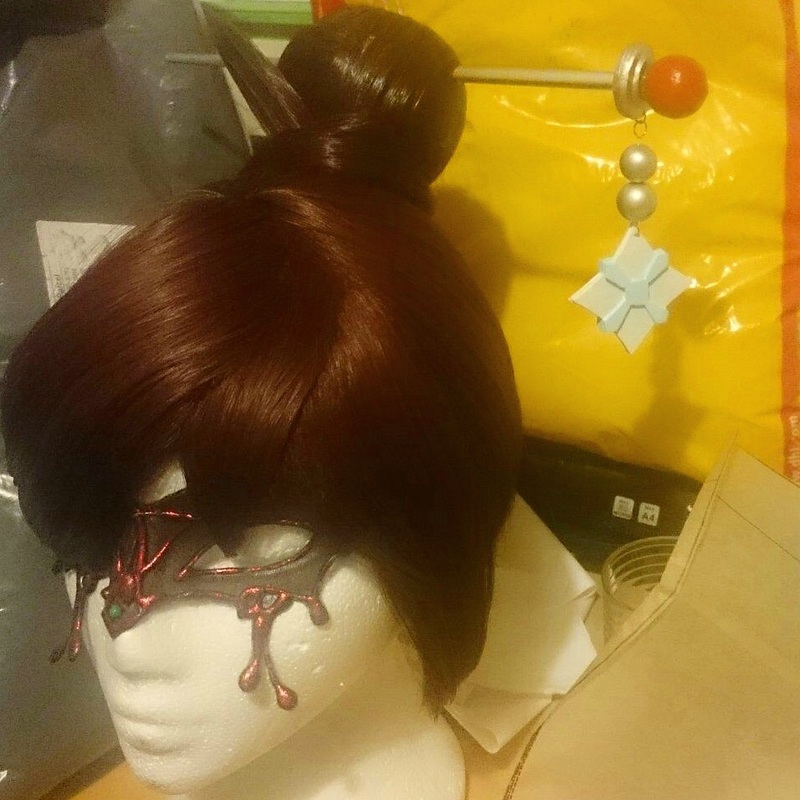 Thank you for reading!!
|
Hello!So many projects, So little time... Archives
January 2017
Categories |
 RSS Feed
